Seven Clear Steps, 6–10 Minutes
Changing the filters in an MVHR, heat-recovery ventilation unit or small AHU normally takes only 6–10 minutes. The job is straightforward, but the sequence matters: stop the unit correctly, identify the supply and extract filters, follow the airflow arrows and reset the maintenance timer. Open any step below for the full explanation.
⏱️ 6–10 min📱 Controller first🧤 Gloves + vacuum

Seven steps
Select a step to open the instructions
1Stop, wait and disconnectController OFF → fans stopped → mains disconnected.⌄
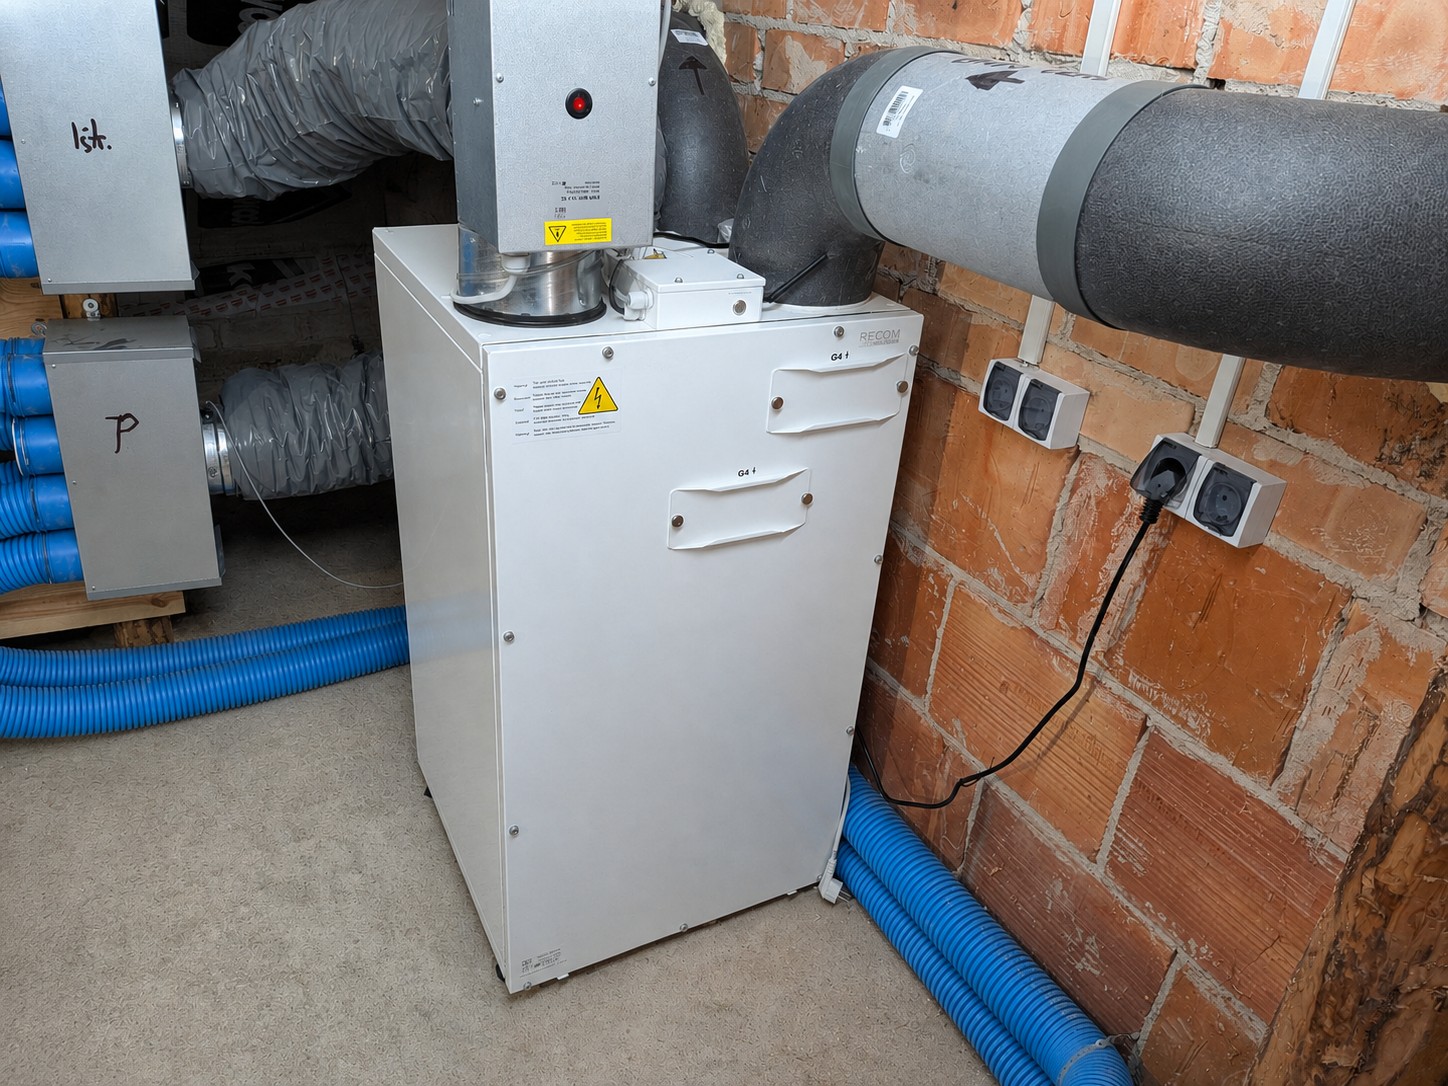
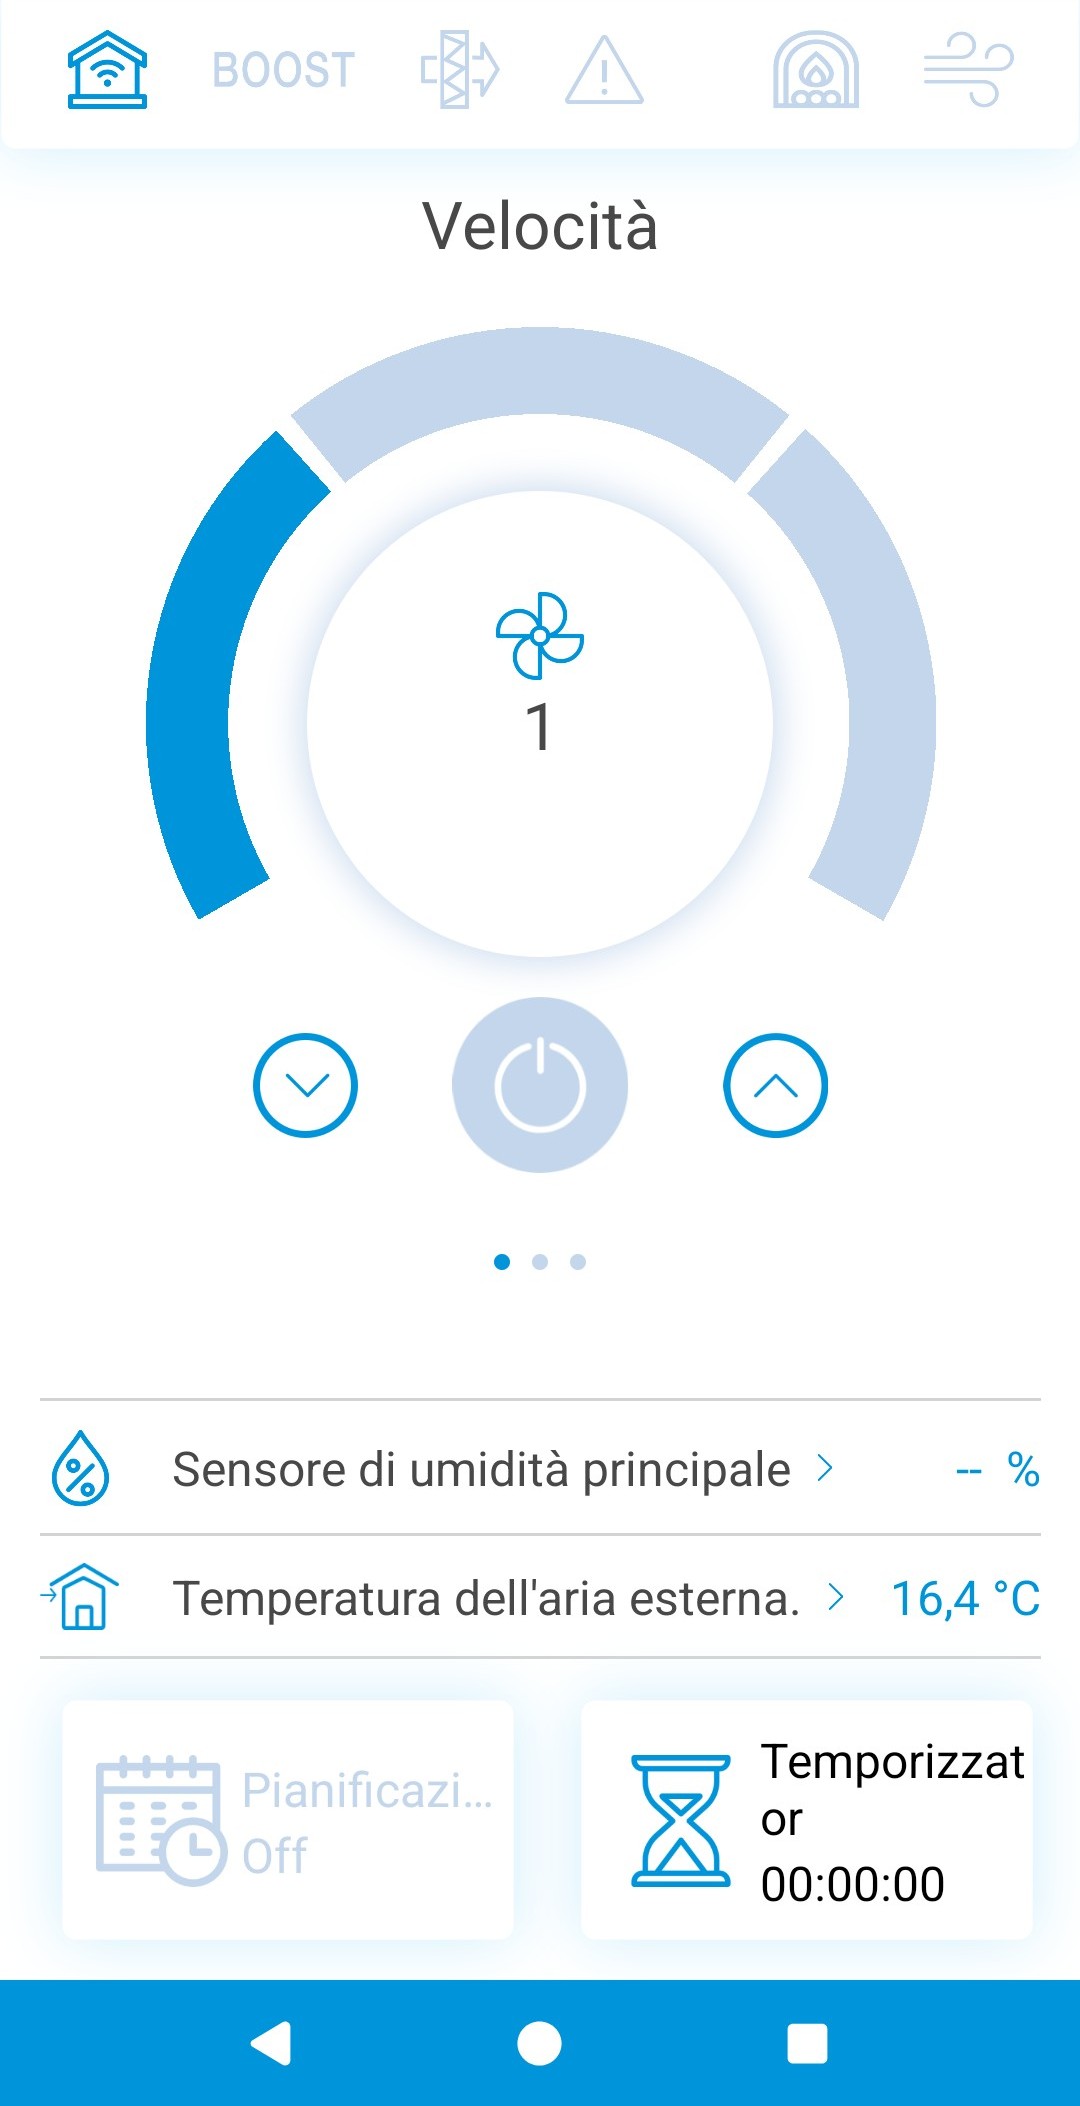
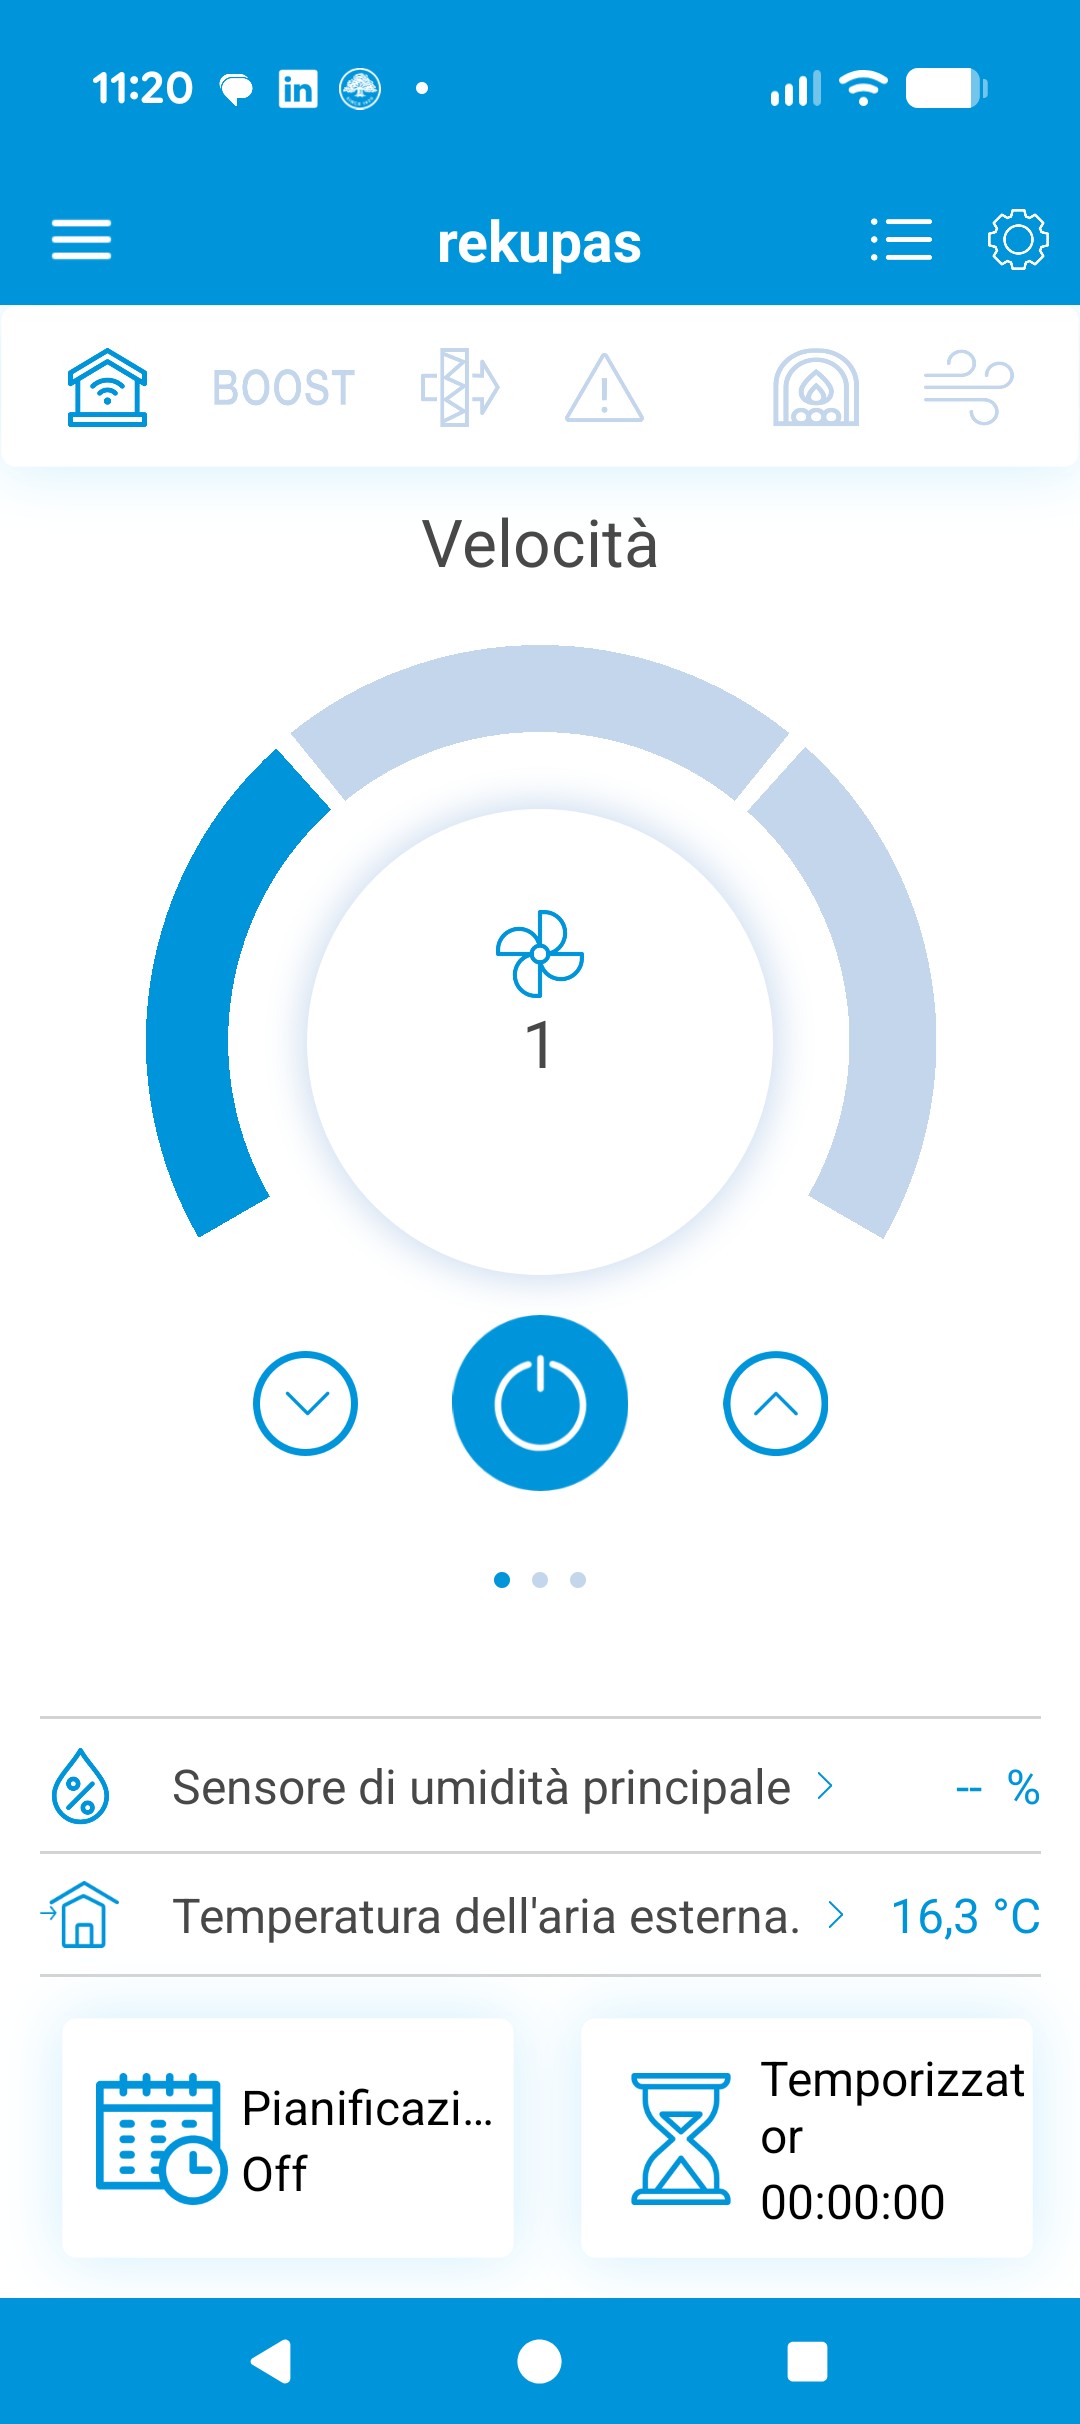
Stop the ventilation unit using its wall controller, local control panel or application. Do not use the plug or mains switch as the normal stop control.
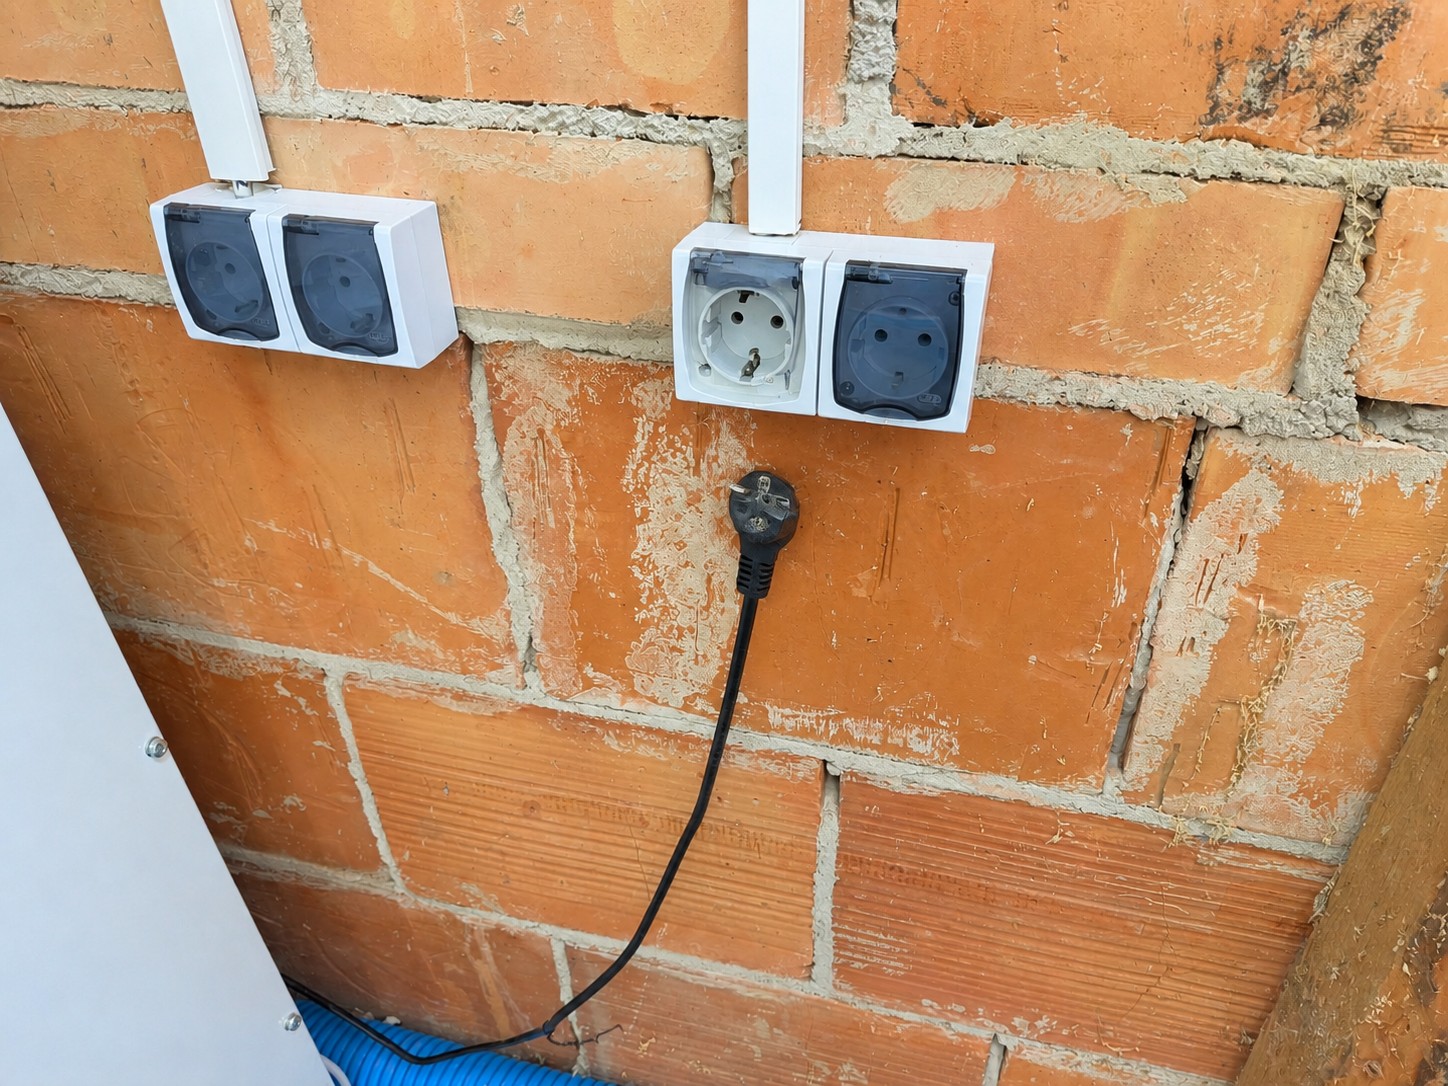
Wait until the fans have stopped completely. The controlled shutdown allows any electric heating element to cool while air is still moving. After the fans stop, unplug the unit or use the dedicated electrical isolator.
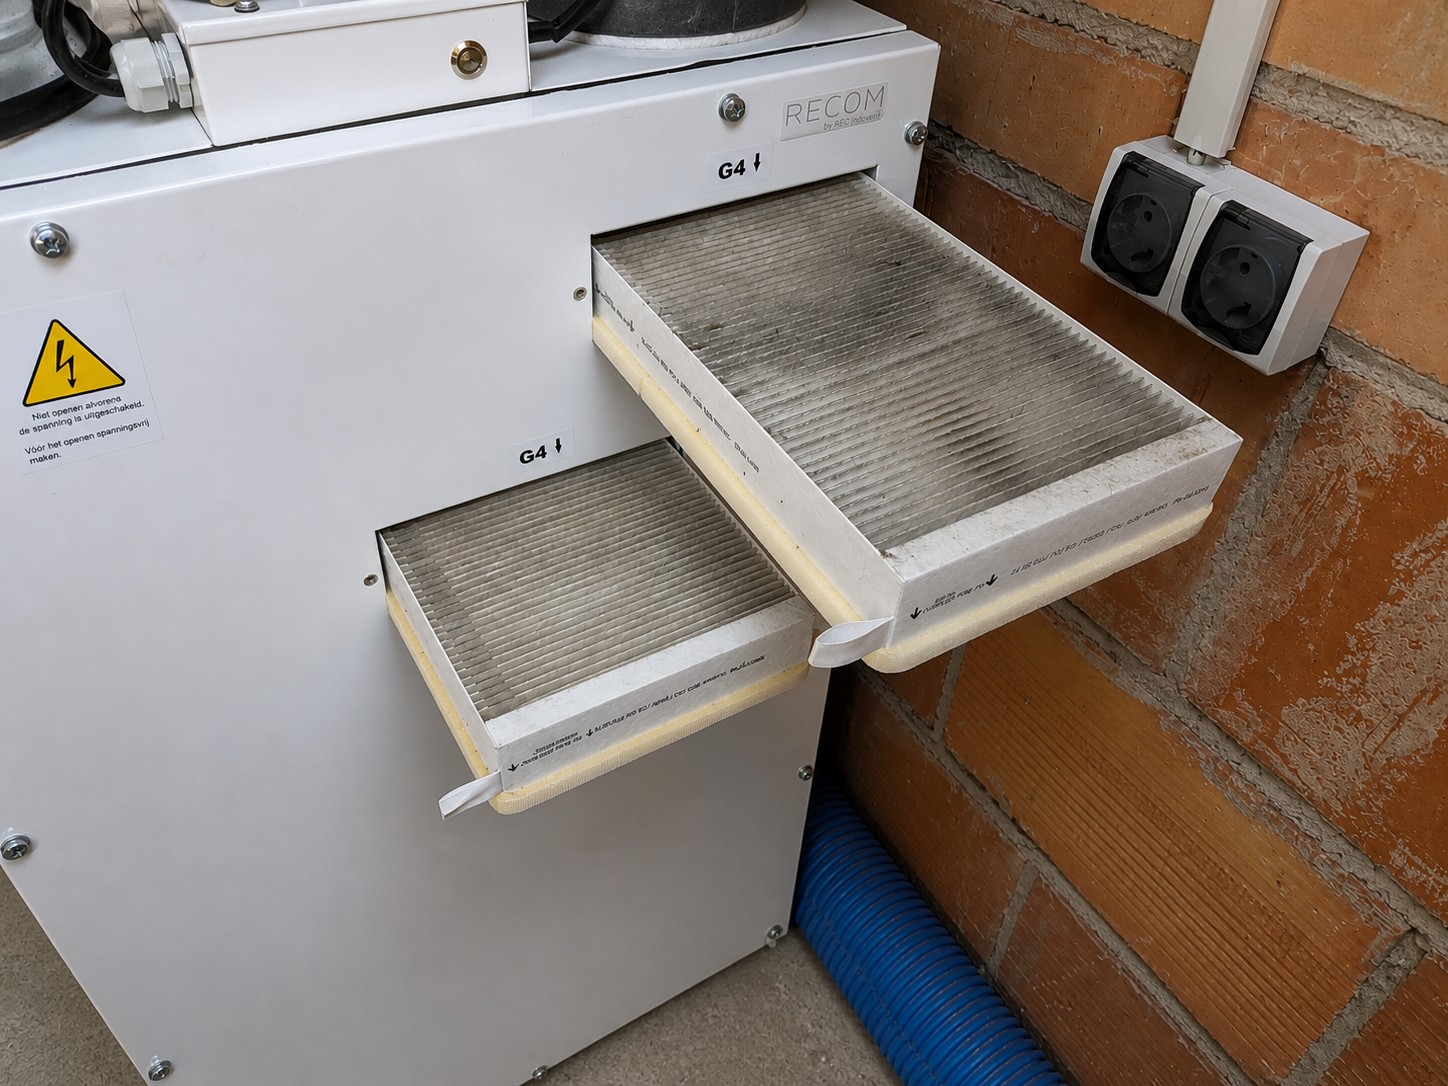
2Open, photograph and remove the filtersOpen the access, record both positions and remove the used filters.⌄
Open the filter caps or remove the front cover, depending on the ventilation unit. Before moving anything, check the supply/extract markings, filter grades and arrows on the filters or casing.
If the positions are not permanently marked, take one photograph showing both ventilation filters. Pull the used filters out by their tabs or frames without shaking them, and note which filter came from each opening.
3Vacuum and cleanRemove dust from the rails and all safely accessible surfaces.⌄
Vacuum loose dust from the filter rails, openings and compartment. Wipe the accessible surfaces with a dry or slightly damp lint-free cloth.
If the front cover opens safely, clean the accessible chamber as well. Do not push a vacuum hose or tool behind protected electrical components, sensors or seals.
4Select and install the correct filtersCheck supply/extract positions, filter grades and every orientation marking.⌄
Two ventilation unit filters may have identical dimensions but different efficiency grades. Match each replacement to the position specified by the manufacturer. If the unit is not clearly labelled, mark the casing itself with removable labels for SUPPLY / OUTDOOR AIR and EXTRACT / RETURN AIR before removing the old filters.
SUPPLY / OUTDOOR AIR
Filters incoming outdoor air before it enters the building. When the set contains different grades, this is normally the finer filter.
EXTRACT / RETURN AIR
Protects the heat exchanger and internal components from indoor dust and fibres.
Read the marking — not every arrow means airflow
In most residential heat-recovery ventilation units, air moves from the external duct connections towards the heat exchanger in the centre. A true AIRFLOW arrow will therefore normally point inwards, towards the centre of the unit.
Some original filters use an UP or THIS SIDE UP mark instead. This shows physical orientation, not airflow direction. This type of marking is found on filters for units such as the Zehnder ComfoAir Q 350/450/600 — available as ePM1 + ISO Coarse or 2 × ISO Coarse replacement sets — and the Zehnder ComfoAir 180. Read the wording next to the symbol and follow the unit manual.
The ZenAero label identifies the SUPPLY AIR or EXTRACT AIR position separately from the airflow or orientation symbol. Insert every AHU or ventilation filter evenly and never force or bend the frame.
5Close the coverRefit every cap or the complete front cover and check the seal.⌄
Close the filter openings or refit the complete front panel. Tighten the fasteners evenly and confirm that the cover sits flat without trapping a seal or pull tab.
6Reconnect power and start the unitRestore power only after the ventilation unit is fully closed.⌄
Reconnect the plug or electrical isolator, then start the unit using its controller or application. Confirm that the fans run normally and that no supply-air, extract-air or fan warning appears.
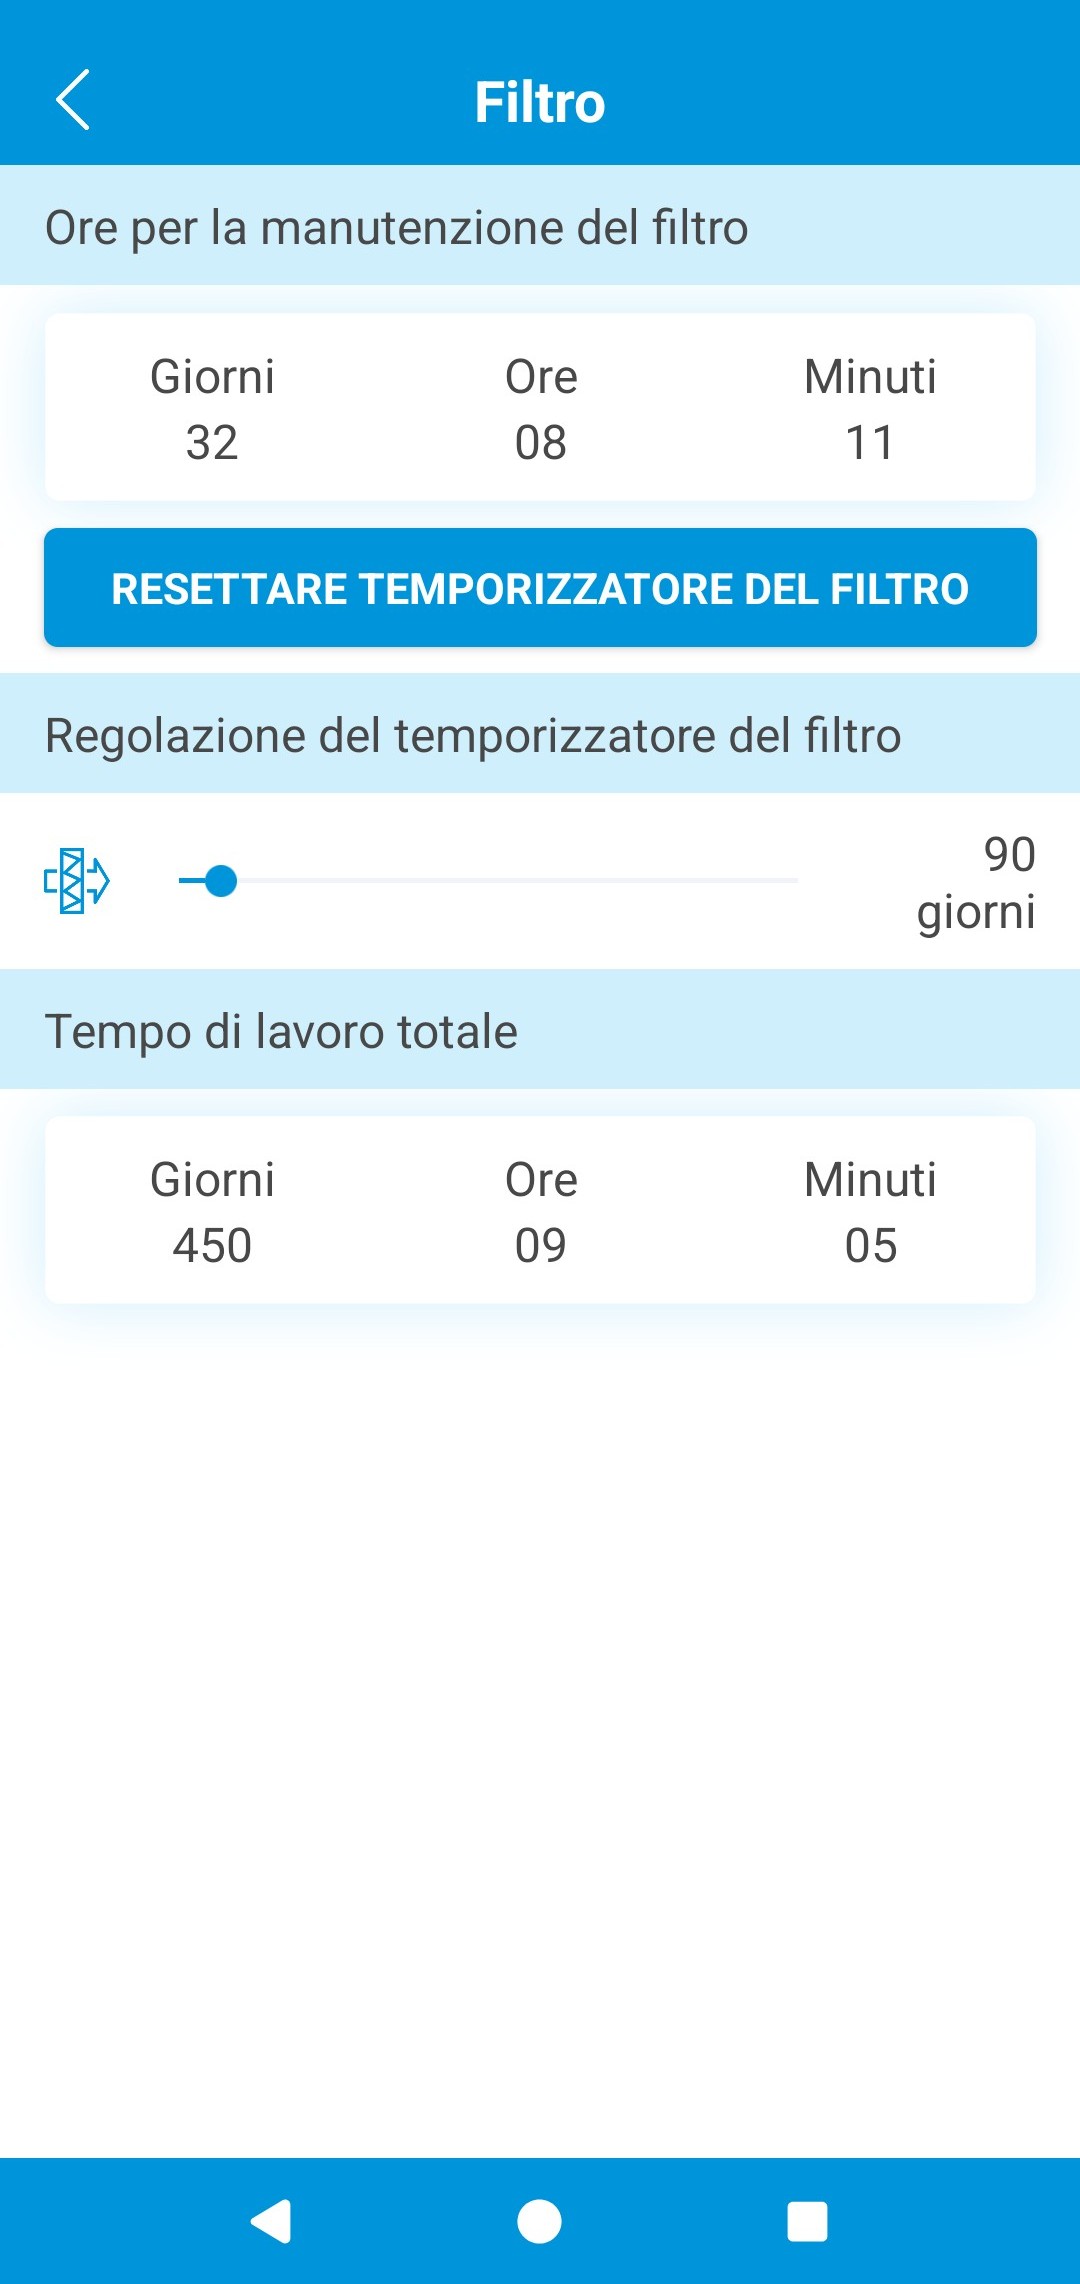
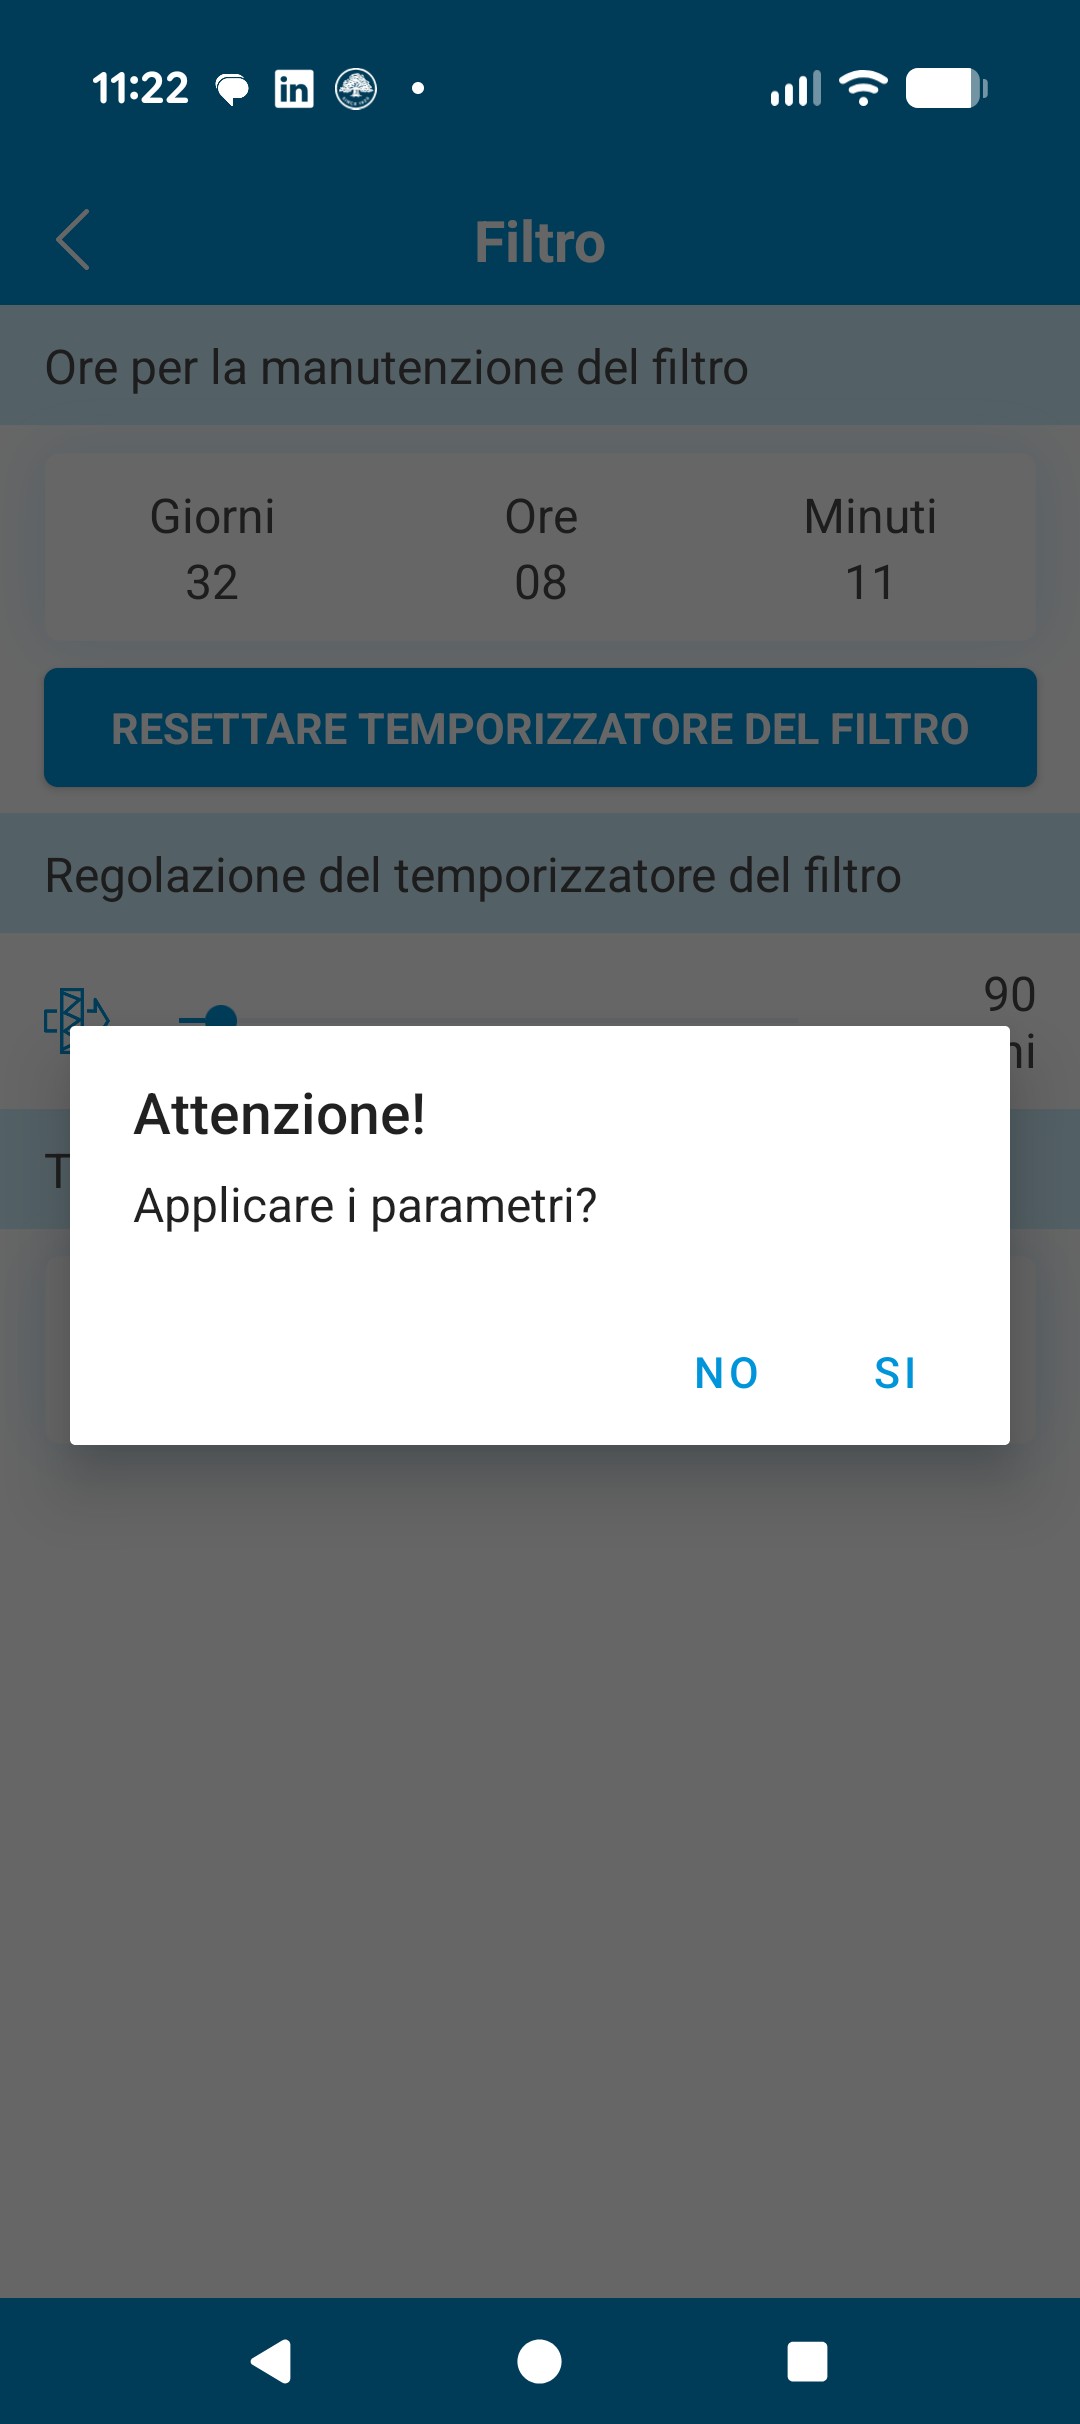
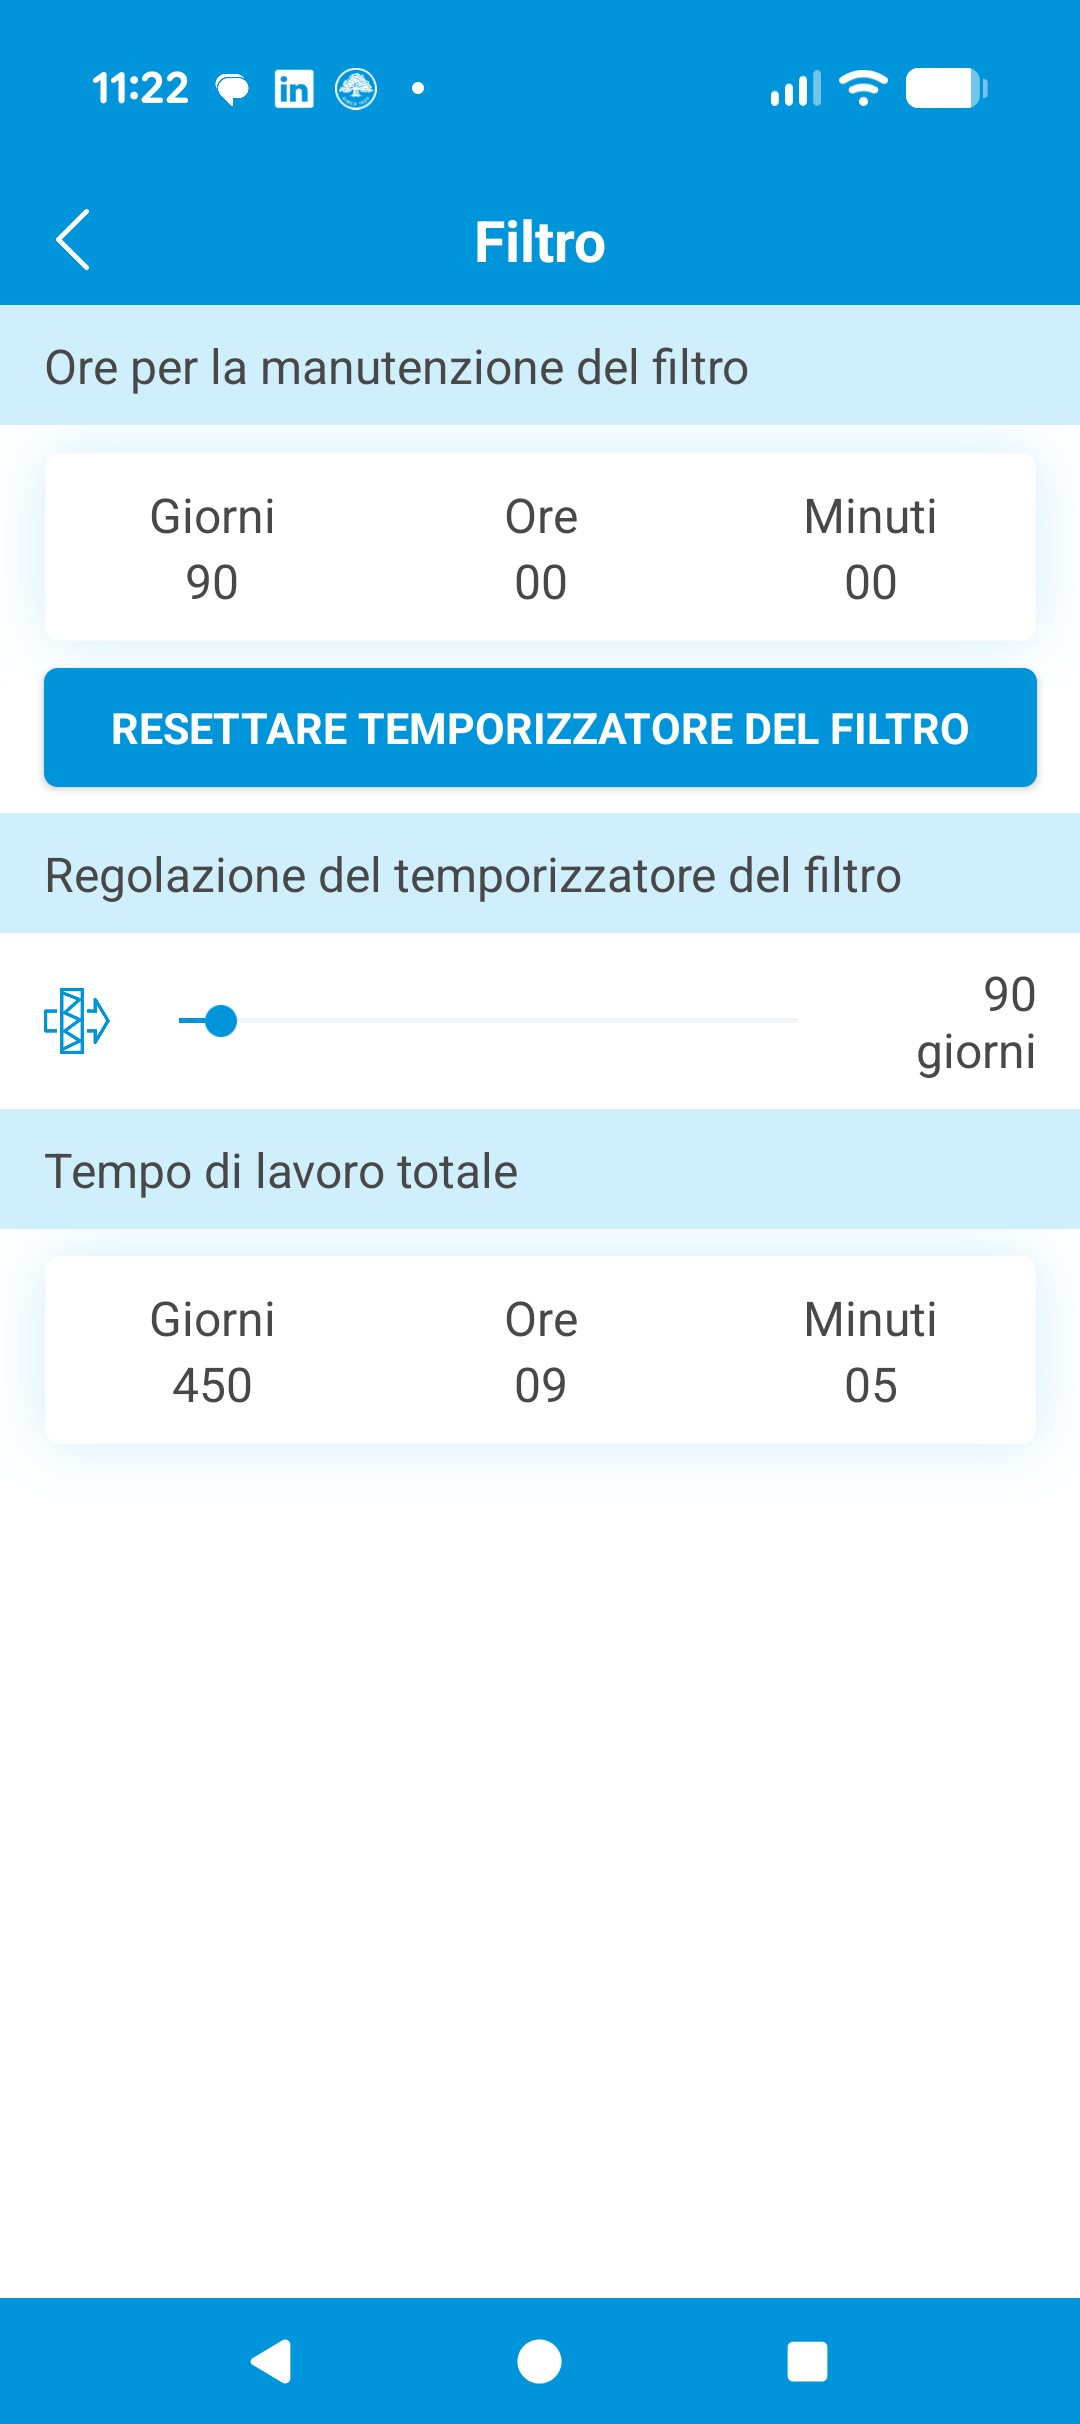
7Reset the filter timerOpen the maintenance menu and confirm the new replacement interval.⌄
Reset the filter-maintenance timer in the controller or application. Disconnecting the power does not reliably reset the reminder on every ventilation unit.
The exact menu differs by manufacturer. Confirm the reset and check that the full maintenance interval is displayed.
 1. Timer before reset
 2. Confirm the reset
3. New interval displayed Common mistakes
⏱️
Timer not reset
The “Change filter” or “Check filter” warning remains active after replacement. Installing new filters or disconnecting the power does not necessarily clear it.
↕️
Marking read incorrectly
Wrong orientation can increase resistance. On filters with V-shaped sealing spacers — including filters for Zehnder ComfoAir Q 350/450/600, ComfoAir 180, Brink Flair 225 and Wolf CWL-2 225 — it can also create air bypass because the seal no longer works correctly.
⇄
Supply and extract filters swapped
Incoming air may be filtered less effectively. The system can become unbalanced and heat recovery can fall if the warm extract-air flow is reduced.
Final checks after restart
The replacement is complete only when all three checks below are satisfied.
✓ No warningNo “Change/Check filter” or fan fault remains.✓ Normal airflowSupply and extract airflow feel normal and the unit is not struggling.✓ No unusual noiseNo whistling, rattling or sudden increase in fan noise.
Frequently asked questions
Open a question for the answer
How do I know which ventilation filter goes in which slot?⌄
Use the supply/extract labels on the unit and the filter markings. When two grades are supplied, the finer filter is normally used for incoming supply air, but the manufacturer specification takes priority.
Do the arrows on an AHU or ventilation filter always show airflow?⌄
No. An AIRFLOW arrow shows the air path and normally points from the duct side towards the central heat exchanger. UP or THIS SIDE UP indicates physical orientation instead. Read the accompanying words and follow the ventilation-unit manual.
Why is the ventilation unit louder after filter replacement?⌄
Check that the filters are fully seated, correctly oriented and suitable for the unit. A filter with excessive resistance can make the fans work harder.
Why does the filter warning remain after replacement?⌄
The maintenance timer usually needs to be reset manually in the controller or application. A power cycle alone may not clear it.
How often should ventilation unit filters be replaced?⌄
Twice per year is a practical baseline, but traffic pollution, pollen, construction dust, occupancy and operating hours can require shorter intervals.
Can I operate a ventilation unit without filters if the old filters were damaged during removal?⌄
No. Do not run an MVHR, HRV or AHU without filters. Dust can block the heat exchanger and coat the fan impellers, reducing airflow and potentially leading to expensive cleaning or repair. Keep the unit switched off until suitable replacement filters are installed.
Need help identifying the correct filters?
Email the unit details and photos directly to ZenAero support.


 First:
 Then:
Then: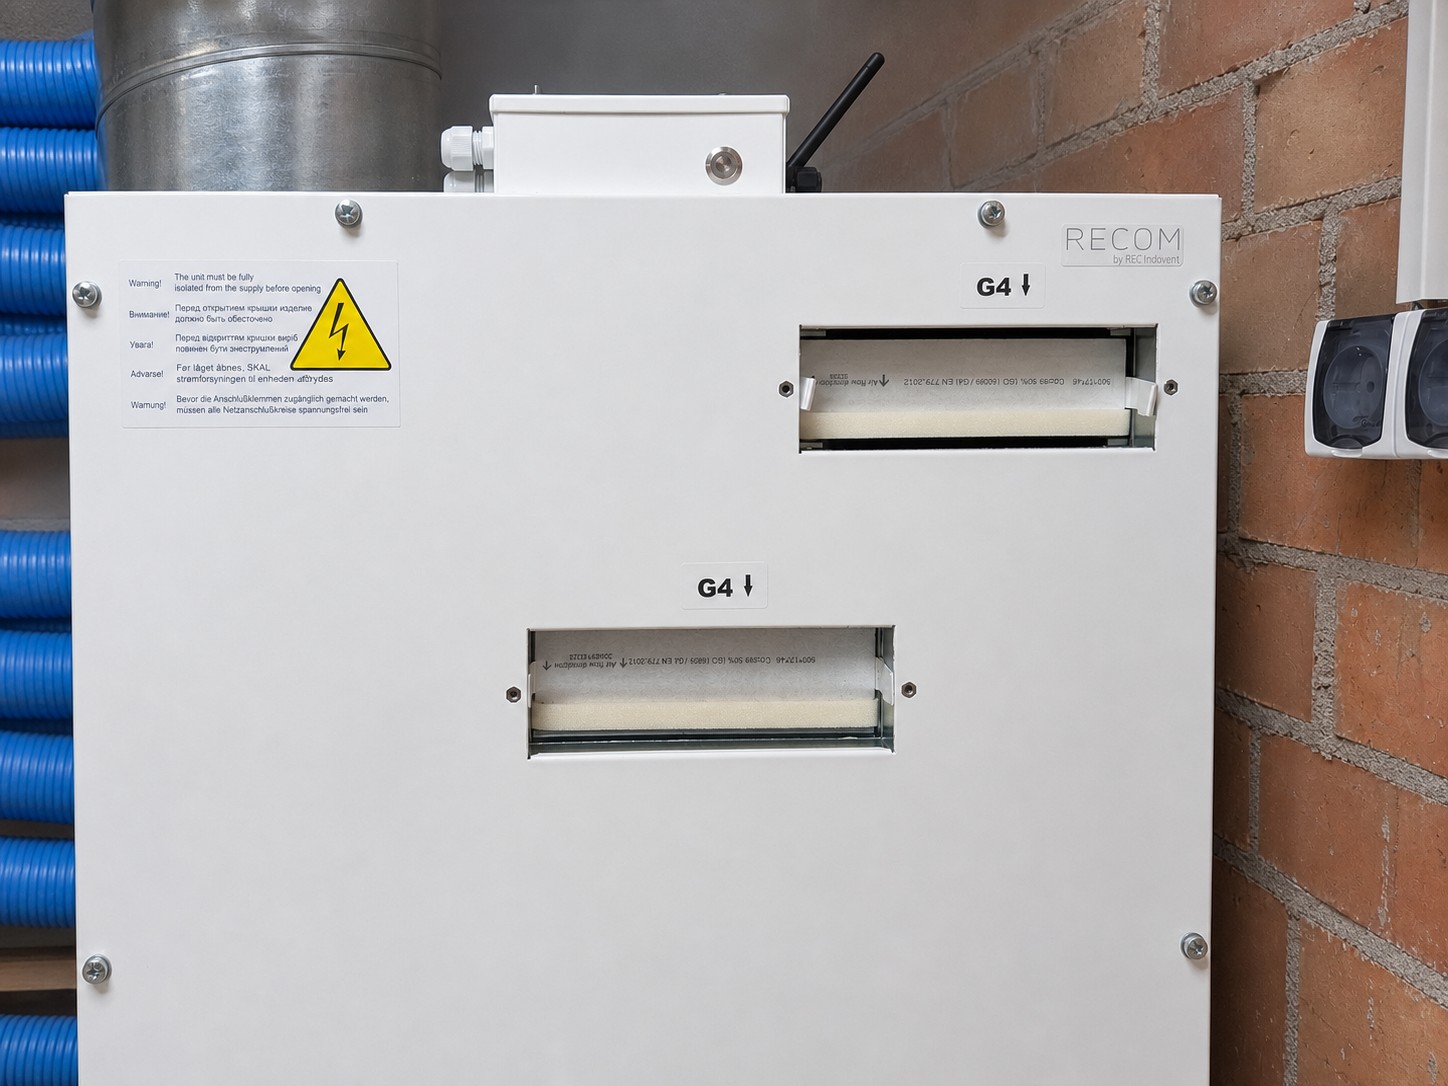 Before removal:
 After removal: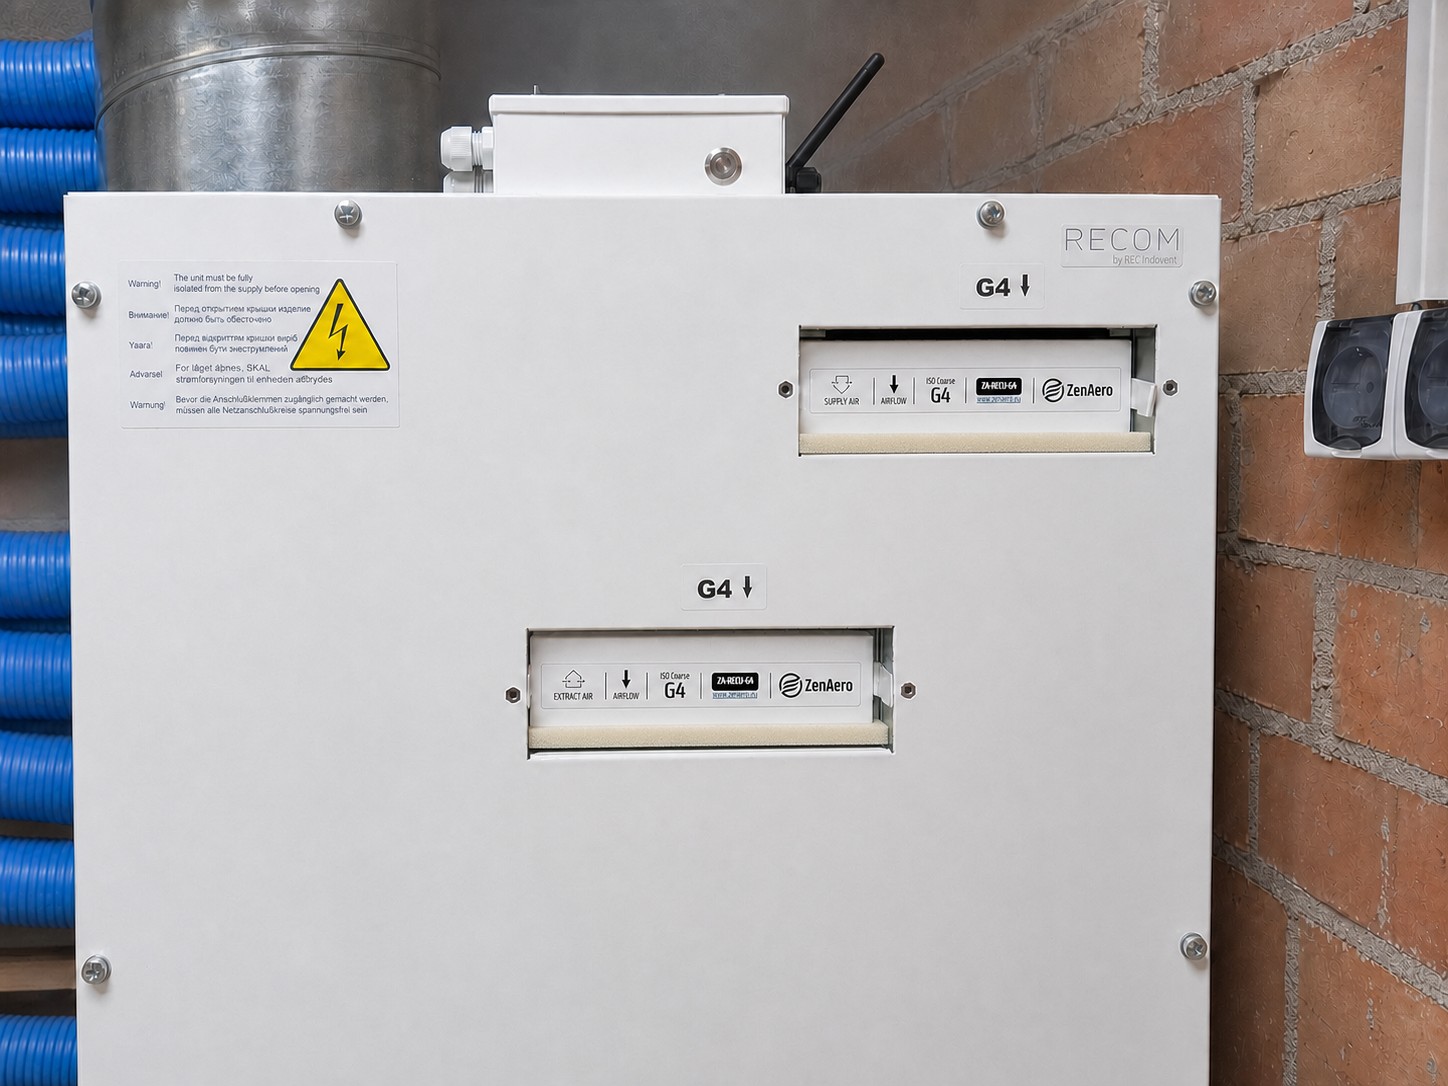
 Check:
 1. Timer before reset
 2. Confirm the reset
 3. New interval displayed